Step-by-Step Guide to Creating a Command Menu Chatbot for OLX
Creating a command menu chatbot in PulsGPT is an excellent way to allow customers to select the information they are interested in and automatically receive responses. In this article, we’ll walk through the steps to set up such a chatbot so that it interacts effectively with customers and helps them access the information they need without requiring personal communication with an operator.
Step 1: Select the Necessary Reaction Blocks
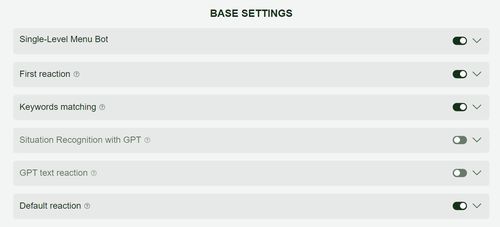
To create a command menu chatbot for OLX, you need to enable the First Reaction and the Default Reaction. The First Reaction will be used to send a welcome message with a list of available commands, while the Default Reaction will handle unrecognized messages.
- Create a new chatbot in PulsGPT.
- Give the chatbot a name.
- Go to the reaction settings section.
- Enable only the "First Reaction," "Keyword Search," and "Default Reaction" blocks.

Step 2: Fill in the Information for the First Reaction
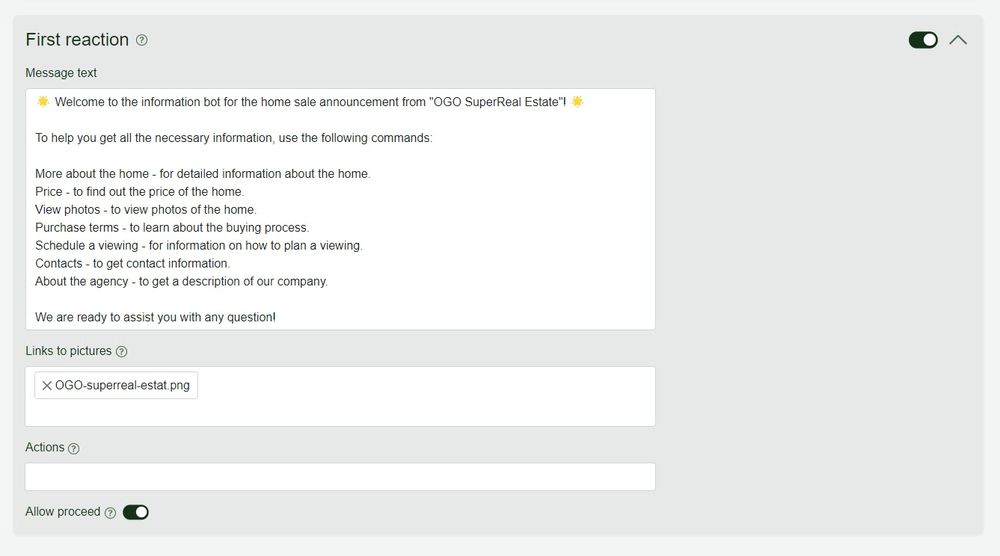
Once you’ve enabled the necessary blocks, you need to fill in the content for the First Reaction.
- Message Text: Enter the text of the welcome message along with a list of available commands. For example: “Hello! Thank you for your interest in our listing. Below is a list of commands you can use: - Price - Availability - Delivery terms”
- Image Links (optional): If needed, add links to images that will help customers better understand your offer.

Step 3: Fill in the Default Reaction
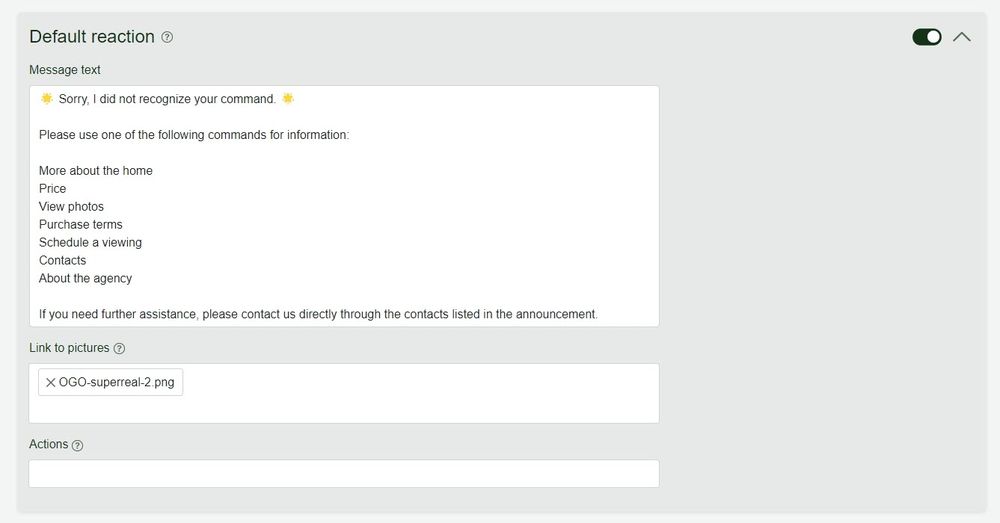
The Default Reaction will be used to handle cases where the customer’s message does not match the listed commands.
- Go to the "Default Reaction" block.
- Message Text: Enter the text that will be sent when an unrecognized command is received, and repeat the list of commands. For example: “Sorry, I don’t understand your command. Please choose one of the following: Price, Availability, Delivery terms.”
- Image Links (optional): Add image links if necessary.

Step 4: Create Conditional Reactions for Commands
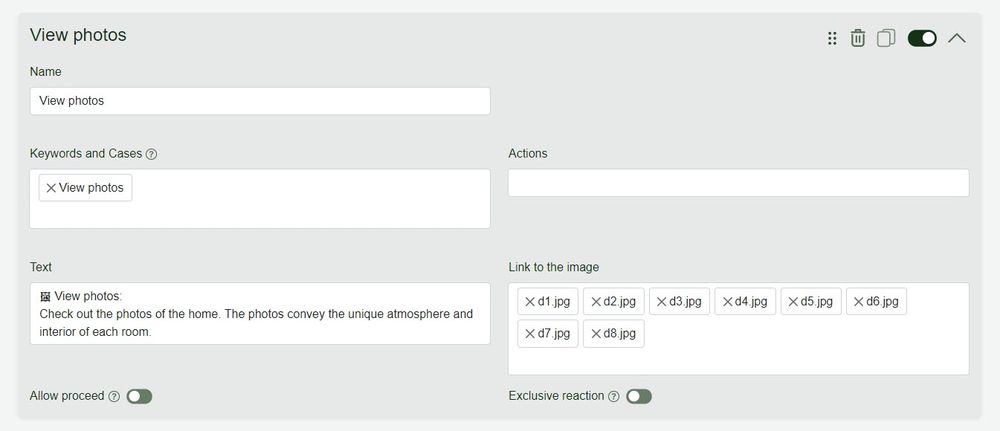
For each command, you need to create a separate conditional reaction so that the chatbot knows how to respond to customer requests.
- Go to the "Conditional Reactions" section.
- For each command, create a new reaction block and give it a name, such as "Price" or "Availability."
- Keywords: Enter one or more keywords that will trigger this reaction when detected in the customer’s message. For example, for the "Price" reaction, you could use keywords like "price," "cost," "how much."
- Message Text: Enter the message text that the chatbot should send in response to this command. For example, “The price of this product is 1000 UAH.”
- Image Links and Actions (optional): Add images and actions if needed, such as notifying the operator or marking the dialogue as a favorite.

Step 5: Save the Chatbot Settings
After entering all the necessary information, don’t forget to click the save button to apply all the changes you’ve made.
Additional Actions
- Multi-Level Command Menu: You can create a multi-level menu by adding more commands in response to the customer’s selected option. For example, when the customer selects "Delivery terms," you can send an additional list of commands, such as "Payment methods" and "Delivery time."
- Disabling the chatbot and Notifying the Operator: In the Default Reaction, instead of repeating the list of commands, you can set the chatbot to stop responding and notify the operator. This is useful if the customer requires personal assistance.
General Recommendations for Creating Menus and Selecting Keywords
- Simplicity and Clarity: Make the commands as simple and intuitive as possible, so customers can easily select the information they need.
- Specific Keywords: Choose keywords that closely match the customer’s questions. The more accurate the keywords, the more effective the chatbot will be.
- Don’t Overload the Menu: Avoid having too many commands in one menu. It’s better to divide them into multiple levels so that customers can easily navigate their options.
Conclusion
Creating a command menu chatbot for OLX in PulsGPT is a great way to automate communication and allow customers to quickly and easily access the information they need. Use this guide to create a chatbot that effectively handles customer requests and helps your business operate more efficiently.